Wednesday, October 16, 2013

Easy-Peasy Crock Pot Chicken

This is a true go-to meal. We all love it. It can be used in so many ways. It's inexpensive. And it's BEYOND easy to prepare! How can you go wrong with that?!

This recipe is taken directly from the A Year of Slow Cooking. Be sure to take a look because there are a TON of great crock pot recipes and you don't want to miss out!

So without further ado, check out the recipe for ....

Easy-Peasy Crock Pot Chicken

Stuff You Need:
  • 1 whole chicken, skinned (4-5 lbs)
  • 2 tsp kosher salt
  • 1 tsp paprika
  • 1 tsp onion powder
  • ½ tsp dried thyme
  • ½ tsp dried oregano
  • 1 tsp ground garlic
  • ½ tsp cayenne pepper
  • ½ tsp black pepper
  • pinch chili powder
  • 1 yellow onion, quartered
  • 4 whole garlic cloves

What To Do:
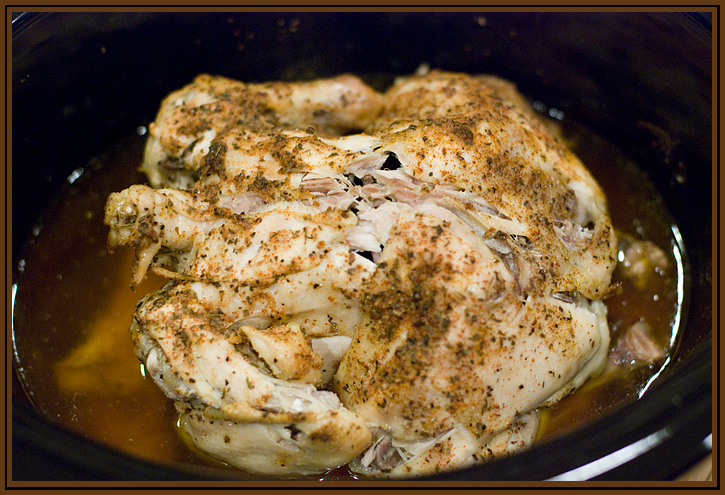
  1. Skin the chicken and remove neck, giblets, etc from the interior cavity.
  2. In a medium bowl, mix all of the dry ingredients except the onion and garlic cloves.
  3. Rub the spice mixture all over the bird, both inside and out.
  4. Place the bird breast side down in your crock pot.
  5. Insert the onion quarters and garlic into the interior cavity.
  6. Cover your crock pot, set the timer on low for 8 hours (or if you are in a hurry, on high for 4-5 hours).


And THAT folks, is all there is to this dish! If you plan in advance, you could prepare your bird the night before - skin it and coat with the spice mixture. Then in the morning all you have to do is pop it all in the crock pot. And when you come home from work, dinner will be ready and waiting!

It's not necessary though. I usually don't plan that far in advance and by the time I have the bird thawed, I generally need to get it right in the crock pot so it will be ready by the time dinner rolls around.

Also note, that while the spice mixture has both paprika, cayenne pepper, and chili powder, this is NOT a spicy dish. Wonder Boy really doesn't like spicy food (I don't know where he gets that trait as both of us prefer food that makes us sweat) and this is one of his all-time favorite foods. If you WANT a bit more kick to your chicken, I would double up on these 3 spices and maybe even stick a jalapeno in the cavity along with the onion and garlic.

The chicken comes out moist and flavorful and falling right off the bone! In fact, it's a not the easiest thing to remove from the crock pot because it starts to fall apart from the moment you try to lift it. I usually don't bother. I'll grab what we need for that meal and then proceed to de-bone and shred chicken for storage once it has cooled.

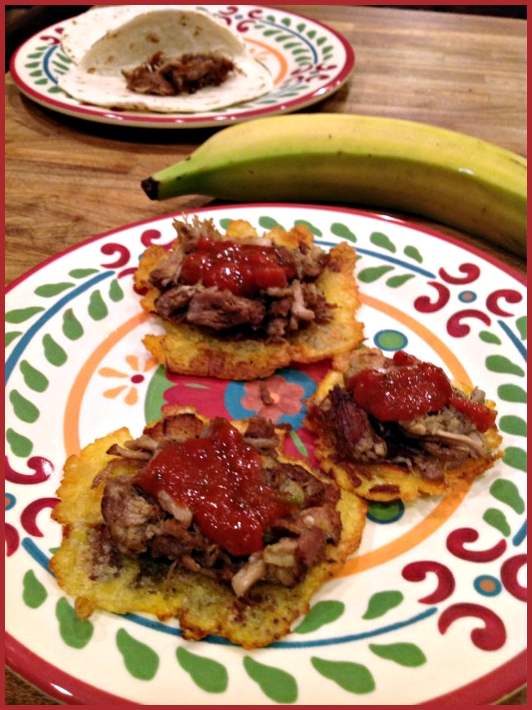
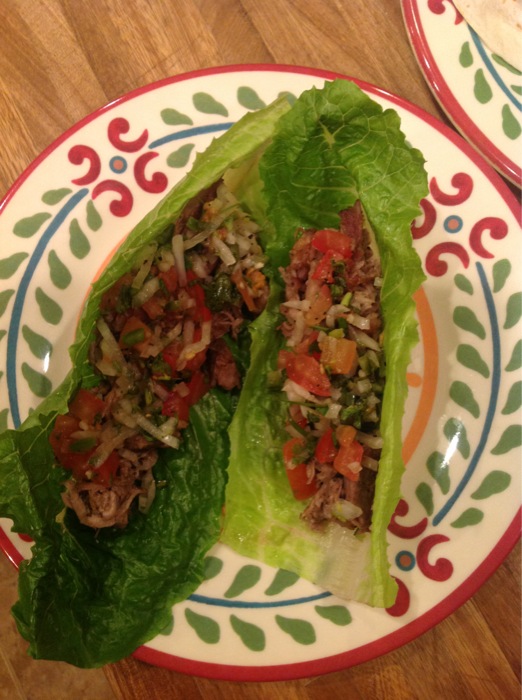
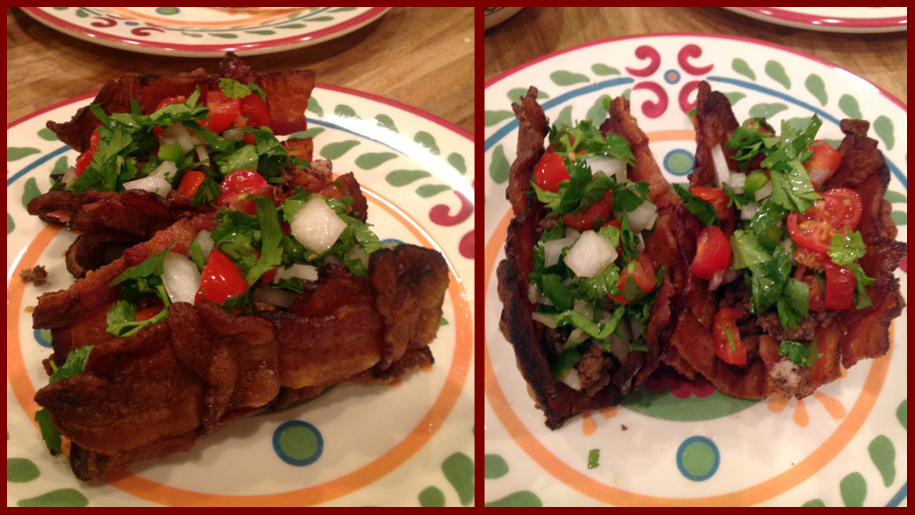
We use this chicken as the base for so many meals. Wonder Boy likes it just wrapped up in a tortilla, fajita style. Wonder Dad prefers it on top of a big salad. As for me - I like it on its own, wrapped up in lettuce (slider style), or on top of tostones with a bit of salsa on top. It really is versatile and that is one of the main reasons this qualifies as one of my top go-to meals!

Enjoy!

Monday, October 7, 2013

Chocolate Chilli

I have so many recipes lined up to share with you here, but this is one that just can't wait!

This weekend was my first time to prepare it and I can promise you I'll be making it on a regular basis - especially as we enter the cooler months of the year. I give you ...

Chocolate Chilli

Stuff You Need:
  • 2 Tbs coconut oil
  • 2 medium onions, diced
  • 2 lbs ground beef
  • 6 oz chorizo (casing removed)
  • 1 tsp dried oregano
  • 2 Tbs habanero chili powder
  • 2 Tbs ground cumin
  • 1 ½ Tbs unsweetened cocoa powder
  • 1 tsp ground allspice
  • 1 tsp salt
  • 1 - 6 oz can tomato paste
  • 1 can chopped tomatoes
  • 1 ½ cup beef broth
  • ½ cup water

What To Do:
  1. Heat a large, deep pot over medium-high heat, then add the coconut oil and melt.
  2. Once the oil is melted, add the onions and cook until they are translucent.
  3. Once the onions look clear, add the garlic and cook for about 30 seconds.
  4. Crumbled the ground beef and chorizo into the pan with your hands and mix to combine with onions and garlic.
  5. Continue to cook the meet mixture, stirring frequently, until it is cooked through (no pink remains).
  6. In a small bowl, mix your dry spices. Stir with a fork to combine.
  7. Once the meat has been browned, add your dry spices and mix well.
  8. Next, add the tomato paste. Stir until it has all been absorbed into the meet mixture.
  9. Finally, add the can of tomatoes (with the juice), beef broth, and water. Stir well.
  10. Bring this to a boil, reduce your heat, and simmer for at least 2 hours.


NOTE: this recipe is almost word for word from The Clothes Make the Girl. Her blog slogan is "Train hard. Eat clean. Live loud." Now that is a philosophy I can get behind!

This is my first recipe to try from her site and if the others are anything like this, then I will probably be heading out to get her book: Well Fed: Paleo Recipes For People Who Love to Eat asap!

I did make a few changes though. First, I added the chorizo. I had some on hand that I wanted to use and honestly, I just love the flavor that a little chorizo can add to a dish. Also, I cut the water in half. I like a really thick chilli, so I didn't want to water it down too much. I kept an eye on it while simmering and made sure it wasn't so think that it started to scorch on the bottom. My advice is to know your stove top. If yours runs hot, you might want to add a bit more water just to be sure.

Bottom line - this is an AMAZING recipe (imho). It was an instant hit in our house. We had it for 2 consecutive meals and plan on including it in as many meals as possible until we hit the bottom of the bowl. We have topped it with diced red onions (yum) and sweet potato crisps (double yum) as well. If you are not strict paleo, I'd bet this would be GREAT with some grated cheese on top as well!

Wednesday, October 2, 2013

Tasty Taters

This one almost sounds too silly to post, but as this is truly a go-to element of my cooking, I feel the need to share it with you today.

Sweet potatoes. Nothing fancy ... just ... sweet potatoes.

Simply put, we eat a LOT of sweet potatoes.

I've never been a fan of the traditional sweet potato casserole dish you might think of when Thanksgiving rolls around. But I absolutely LOVE sweet potatoes that are served crispy and crunchy and a touch salty.


I've been known to broil them, bake them, and sometimes even fry them. But I almost always top them with a healthy sprinkle of sea salt and pepper.

Currently, my favorite way to prepare these orange beauties is to slice them into shoe strings (a good mandolin slicer is key here) and then fry them up in coconut oil.

But if deep frying is not an approved activity in your kitchen, these are just as satisfying when you slice 'em up, coat with coconut oil (or your favorite vegetable oil - we sometimes use olive oil), season 'em up, lay 'em down on a cookie sheet, and broil until you reach your desired crunchiness - which for me is achieved just a few seconds before they burn to a crisp.

So ... no elaborate ingredients or instructions, slice, coat with oil, bake/broil/fry, season, and ENJOY!

I have been known to pair this with beef, chicken, and pork. I've served them on top of a burger patty (wrapped in lettuce). Heck, I've even crumbled them up and sprinkled them on top of deviled eggs.

With this sweet and savory side, you just can't go wrong wherever you add it to your plate!

Monday, September 23, 2013

Tostones (Fried Green Plantains)

As you know from my previous post, I have a pretty long standing love affair with fried plantains. Wonder Dad and his family introduced them to me while we were still dating and I have looked for ways to include them in our meals ever since.

So I was seriously psyched when I ran across a post over at Everyday Paleo that featured plantains in a way I had never tried before: Tostones!

Usually, when I am frying up a batch of plantains, I go looking for a nice, ripe (brown) plantain. But this recipe calls for the GREEN variety.

With this preparation, you slice up the plantains, fry 'em just a bit to soften up, flatten them, and then fry them again to crisp everything up.

Like the folks over at Everyday Paleo, we topped ours with carnitas - like little tostadas - and they were down right AMAZING! I had found a new way to love plantains!

In fact, I was so enamored, I have served them at 3 more mealtimes just for good measure (and to enjoy this treat before my plantains ripen any further)!

These are super easy and beyond tasty! Here's how you prepare them ...

Tostones (Fried Green Plantains):

Stuff You Need:
  • 2 green plantains
  • 1 cup coconut oil
  • sea salt (for sprinkling)

What To Do:
  1. Peel plantains and slice into 2 inch chunks.
  2. In a deep frying pan over medium heat, melt coconut oil.
  3. Once the oil is hot, add the plantain slices into the oil standing on one end.
  4. Fry until one side is golden brown, flip, and fry the other side until golden brown as well.
  5. Remove from the heat and place on plate lined with paper towels to drain off any excess oil.
  6. One at a time, place between sheets of parchment paper and smash with a plate to about a ¼ inch thick.
  7. Add the flattened plantain patties back to the oil
  8. Sprinkle sea salt, top 'em up, and devour!


We enjoyed these topped with carnitas and salsa, but they also work great just dipped in salsa or guacamole!

I am looking forward to trying all kinds of new toppings for these - I get the feeling that the sky is the limit!

Sunday, September 22, 2013

Fried Ripe Plantains (Maduros Fritos)

I was introduced to this sweet treat not long after I met Wonder Dad. His folks are from Ecuador and this was a staple in their kitchen. I have to admit, it was love at first bite.

Not long after we were married, I tried my own hand at this dish and just failed miserably! It took quite a few sub-par attempts before I found out the key to sweet success ... you need BROWN plantains. In fact, it when the plantains start to look like they are going bad (at least compared to a banana, which was my only frame of reference) that they are indeed ripe and ready to fry up!

So here's the down low on this simple yet tasty treat ...

Fried Plantains (Maduros Fritos):

Stuff You Need:
  • 2 very ripe plantains
    (put them in a brown bag and wait a few days if you can only find the ripe ones at your grocery store)
  • 3 Tbs coconut oil
  • cinnamon (for sprinkling)
  • sea salt (for sprinkling)

What To Do:
  1. Peel plantains and slice on the bias (diagonal). I like for mine to be about 1 ½ inches long and ½ inch thick.
  2. Heat skillet over medium heat and add the coconut oil.
  3. Place plantains in skillet and fry about 2-3 minutes on each side, being careful not to burn them.
  4. Remove from the heat and place on plate lined with paper towels to drain off any excess oil.
  5. Sprinkle with cinnamon and sea salt and ENJOY!


These plantains pair well with chicken, beef, and pork alike! I've even chopped them up and put on a side salad!

Regardless of how you serve them, they are such a tasty treat that it's like having dessert for dinner!

Wednesday, September 18, 2013

Crock Pot Carnitas

Living deep in the heart of Texas (clap!clap!clap!clap! - sorry, I couldn't resist), Mexican food is a staple. And that is something I sincerely didn't want to lose with our change in diet.

I gave up the rice and beans and even my beloved enchiladas, but there HAD to be some elements of Tex-Mex cooking that we could keep in our lives.

Enter the not-so-humble carnitas! Always one of my favorites, carnitas are great on their own, wrapped up in a large lettuce leaf, or even as the star of a fancy stir fry. A very versatile dish with lots of flavor! SCORE!

Preparing them in the crock pot means I can throw them in first thing in the morning and know that a super, savory dinner will be waiting for me after work. More often though, this is a weekend meal as it feels like such a treat.

Momma G's Crock Pot Carnitas

Stuff You Need:
  • 4 lb boneless pork shoulder roast
  • 1 tsp salt
  • 1 tsp garlic
  • ½ tsp cumin
  • ½ tsp chipotle chile powder
  • ½ tsp dried oregano
  • ½ tsp ground coriander
  • ½ tsp cinnamon
  • 2 cups chicken broth
  • black pepper and salt to taste
  • 1 Tbs coconut oil (or other oil of your choice)
What To Do:
  1. Mix together salt, garlic powder, cumin, chile powder, oregano, coriander, cinnamon, salt, and pepper in a bowl.
  2. Cut pork roast into 3" - 4" chunks, coat with the spice mixture, and place in the crock pot.
  3. Pour the chicken broth around the sides, being careful not to rinse off any of the spice mixture with the broth.
  4. Cook on low for 6 or 7 hours or until the pork can be easily shredded with a fork.
  5. Before serving, melt coconut oil in a large skillet.
  6. Remove shredded meat from the juice and place in the skillet with the coconut oil.
  7. Stir until evenly browned and you can see a light crisp on your pork.


I have found this to be a true go-to meal (or meal starter). I make it about twice a month, on average, since there are just so many ways to serve it.

The most common way we eat this family favorite, is as "tacos." For Wonder Dad and I, that usually means lettuce wraps. For Wonder Boy, it's one of his favorite soft taco fillings. Carnitas taste great on salads. They stand up well as the main entree (served with a tomatillo salsa and fried plantains on the side). And Wonder Dad and I both really love carnitas as the starting point for a nice spicy stir fry.

Between being so easy to make and being so versatile, this dish is one of my top go-to meals!

Tuesday, September 17, 2013

Bacon Shell Tacos

This recipe is almost word-for-word from Nick over at Dude Foods. I decided to give this a try for Father's Day this summer as tacos are one of Wonder Dad's favorite foods. And we had both been missing his favorite crispy treat. Sure, we had been enjoying some nice spicy lettuce wraps, but it just wasn't quite the same experience. So when I saw these instructions on the Dude Foods blog, I knew I had to give it a try.

To say that this dish was a success is such an understatement. Right then and there, Wonder Dad and Wonder Boy alike, put in their "order" to have these as their special meal on their birthdays!

So ... without further ado, I give you the

Bacon Shell Tacos

Stuff You Need:
  • bacon
  • kabob sticks
  • pint-sized mason jars

What To Do:
  1. Preheat oven to 400F degrees.
  2. Create square bacon weave. I used 6 strips across and 6 strips down.
  3. Place in oven and bake for about 15 minutes.
  4. This is the point where I diverge from Nick's instructions. Nick shaped his square weave into a circle, like a traditional taco shell. I didn't feel like going to all that trouble, so I simply sliced mine in half, making 2 rectangles.
  5. Place your mason jars on a cookie sheet lined with aluminum and balance your kabob sticks between them.
  6. Hang the bacon rectangles over the kabob sticks that are balanced across the mason jars and return to the oven for another 10 minutes, until bacon is cooked to desired crispness.
  7. Remove from oven, stuff with your favorite taco meat or fajitas, and top with fresh salsa or pico de gallo.


It has simply AMAZED me how well these hold their shape! And unlike a crispy corn taco shell, when you bite into it, it doesn't crumble all over your plate.

However, with the fat & salt content of the bacon so high, this is not a dish I would label "healthy" and thus this is only a go-to for super special occasions around here. So it is with great anticipation we flip through the calendar, looking for days that are "Bacon Taco Worthy."

On what special days would you break out this incredible treat?

Chorizo Mini-Meatloafs

I'll admit it, I don't think I've ever had a meatloaf I didn't like. My favorite is the dish my mom always made when I was growing up. Her standard fare included ground beef, minced onions, ketchup (with all its sugary goodness), mustard, and crushed Ritz crackers (need I say more?) to stretch the meal enough to feed us all.

But that version is no longer welcome in my kitchen. So what's a girl craving comfort food to do? Well, as I have resorted to doing so often over the last few months, I took this challenge to the web. I finally stumbled on this beauty of an ideas ... chorizo meatloaf! My mouth waters just to read the words.

My concoction is similar to this one found on-line, but with my own preparation methods (I didn't saute the onions or garlic, I changed the amount of almond flour, and I added the bell peppers). In the end, this was a nice treat for us that I am certain will be a regular on our menu.

Momma G's Chorizo Mini-Meatloafs

Stuff You Need:
  • 1 Tbs coconut oil, melted
  • 1 lb extra lean ground beef or ground turkey
  • 1 lb chorizo, casing removed
  • 1 cup minced onion
  • ½ cup diced bell pepper
  • ½ cup almond flour
  • 2 Tbs adobo sauce (from a can of chipotles in adobo)
  • 2 egg whites
  • 3 cloves minced garlic
  • black pepper and salt to taste
What To Do:
  1. Preheat oven to 350F degrees.
  2. Prepare tin muffin cups by poking holes in each cup to allow grease drain while cooking. Brush melted coconut oil in the cups to prevent sticking.
  3. In a large bowl, mix all ingredients. It's messy, but using your hands is the best way to get everything distributed just the right way.
  4. Fill each cup with the meat mixture.
  5. Place muffin tin on cooling rack on top of cookie sheet and pop in the oven.
  6. Bake for 30 minutes.
  7. Before serving, I like to place on a plate lined with paper towels to soak up any grease left on the bottom. After just a few minutes they are ready to plate and enjoy!

the first time I made this, we had it for dinner, served with fried plantains and a side salad, but my favorite way to enjoy this little treat is for breakfast, with fried egg whites and some fresh pico de gallo on the side!

Happy eating!

Monday, September 16, 2013

First Share: Paleo Chocolate Donuts

I wanted this first share to be a special one. And this little snack is turning out to be a go-to recipe in that I always pull it out when special occasions (like a birthday or Father's Day) come around and now I am starting to turn to it for pot luck dinners as well.

When we began changing our eating habits, the first thing we thew off the menu was anything containing sugar. And we made this kitchen-centered decision just a week before Mother's Day and only 2 weeks before our anniversary. I'll admit to more than my fair share of bitterness over this call. Holidays and celebrations are normally full of visits from the Chocolate Fairy and I was missing her before we even said "adios."

So when Father's Day came around a month later and I was beginning to come to grips with holidays minus their sugar coating, I went looking for something to satisfy my sweet tooth. After a quick search, I found a couple of recipes for paleo chocolate donuts on the 'net. I didn't have everything on hand to follow just one recipe, so I took these two (this one and this one) and combined them into the following:


Momma G's Paleo Chocolate Donuts

Stuff You Need:
  • donut pan
  • ¾ cup almond flour
  • ¼ cup unsweetened dark cocoa powder
  • ¼ teaspoon baking soda
  • pinch of salt
  • 3 eggs (separated)
  • 3 tablespoons coconut oil, melted
  • 3 tablespoons honey
  • ¼ teaspoon vanilla extract
  • ½ cup chopped strawberries
What To Do:
  1. Preheat oven to 350F degrees.
  2. In a large bowl combine almond flour, cocoa powder, baking soda and salt.
  3. Separate eggs and combine yolks with remaining wet ingredients.
  4. Add wet ingredients to dry and stir until combined.
  5. Beat egg whites with a hand held mixer until light and fluffy.
  6. Fold egg whites into batter until just combined.
  7. Add strawberries, stir gently.
  8. Pour batter into pastry bag (or zip lock bag with the tip snipped off)and pipe into donut pan.
  9. Bake for 12-13 minutes, until a tooth pick inserted comes out clean.
  10. Remove from pan and transfer to cooling rack.
Note: if the strawberries are an issue (due to allergies or if you are just not a fan), feel free to leave them out. I think they help keep the donuts nice and moist, but they are not essential to delivering a satisfying treat. My Wonder Boy is not a fan, so I always make a couple just for him without the blessed berry and he loves them all the same. Other seasonal berries (like raspberries) also work really well, if you prefer.

Momma G's Easy Chocolate Glaze
  • ½ cup dark chocolate chips, melted
  • 1 tablespoon coconut oil
Mix together coconut oil and chocolate then use spoon or knife to scoop out some of the chocolate to glaze donuts. If you have a nice wide bowl, you can always invert donuts and dunk them as well.

I have trouble waiting for them to cool enough for that little trick, so I usually stick to the spoon.

Bacon Bonus!
For a really special treat, I turn to the "bacon bonus." If you decide to up the wow factor on your donuts, you just need to crisp up 1-2 strips of bacon before starting in on you donuts. Allow them to cool completely and crumble. Once your donuts are glazed, generously sprinkle bacon bits onto the top and allow it to set before serving.

I employed the "bacon bonus" when we pulled this recipe back out for Wonder Dad's birthday and it was a HUGE HIT with everyone in the family! Alternately, we have also sprinkled sliced almonds on top as well. And while that too was a crowd pleaser, it was nothing like the response we got with the bacon bits.

Sunday, September 15, 2013

Introductions

Howdy and welcome to my little corner of the kitchen!

I love to cook. I love to fiddle with recipes. I love to plan meals. I love to play with my kitchen toys. What can I say? I just love to create dishes that make my family beam.

And I'll be honest, I love to eat too.

But sometimes that love gets me in trouble.

In the past few months, we have begun to transform the way we eat. It hasn't been an easy transformation, but I am rediscovering the joy in my kitchen by checking out new dishes and finding ones that align with my new focus in the kitchen.

And as a bonus, we are seeing the difference where we most need to see it - on our waist lines!

I've been trying to find a word or phrase that best describes the changes we've made. It's not really "paleo." It's not exactly "South Beach." And it's not even really "low carb." But we have taken elements from all of these to get to some combination that works for our family. You won't find me hawking a particular life style on this blog. Instead, I'll post what has worked for us, and maybe it will help you out as well.

My vision for this blog is to share some of my go-to meals. But I will also share some recipes that were just plain fun and tasty, even if I wouldn't classify them as "go-to."

And I will probably share some of my all time favorites as well. Those we will just have to enjoy in moderation.

So I hope you enjoy hanging out on the kitchen with me. Hopefully we can all have a little fun and enjoy a few good eats along the way.