Showing posts with label chocolate. Show all posts

Sunday, April 6, 2014

Dark Chocolate Cupcakes

If you have spent any time following this little blog, you know I have a bit of a sweet tooth. And I particularly crave chocolate. For me, it was a true relief to learn that dark chocolate is often featured in Paleo kitchens around the globe.

My chocolate donuts are a family favorite when we need to satisfy our sweet cravings and we often take them to pot luck dinners since they are such a decadent treat, enjoyed by even those who do not embrace Paleo cooking methods. But when faced with dinner with friends who have nut allergies, we needed to find a nut-free alternative to our favorite dessert.

These cupcakes feature coconut flour and arrowroot powder in place of almond meal. This recipe reminds me of devil's food cake in that it is moist and rich with a lovely dark color. Wonder Boy and I both really like dark chocolate and thus these were an instant favorite. Our friends all seemed to enjoy them as well. It is likely that this will be a recipe that we can take to church or school functions where you don't know if there will be anyone present with nut allergies.

Dark Chocolate Cupcakes

Stuff You Need:
  • 3/4 cup cocoa powder, sifted
  • 1/3 cup coconut flour, sifted
  • 1/3 cup arrowroot powder, sifted
  • 1/2 tsp baking soda
  • 1/2 tsp baking powder
  • 1/4 tsp kosher salt
  • 5 eggs
  • 1 cup all-natural applesauce
  • 1/4 cup honey
  • 1 Tbs vanilla
  • 1/2 tsp liquid stevia
  • 1/4 cup coconut oil, melted
What To Do:
  1. Preheat oven to 325F.
  2. Wisk cocoa powder, coconut flour, arrowroot powder, baking soda, baking powder and salt in your mixing bowl.
  3. In a separate bowl, combine the eggs, applesauce, honey, vanilla, and stevia. Mix on high for at least 2 minutes. The longer you mix, the lighter and more airy the cupcakes will be.
  4. With the mixer still running on low, drizzle in the melted coconut oil until well combined.
  5. Add the dry ingredients, 1/4 cup at a time until well incorporated.
  6. Fill your cupcake pan with paper liners and fill 2/3 full with batter. This should make between 18 - 24 cupcakes, depending on how long you whipped up the batter.
  7. Bake for 35 minutes, or until a toothpick inserted comes out clean.
  8. Remove the cupcakes from the pan and cool on a wire rack for at least 30 minutes before icing.
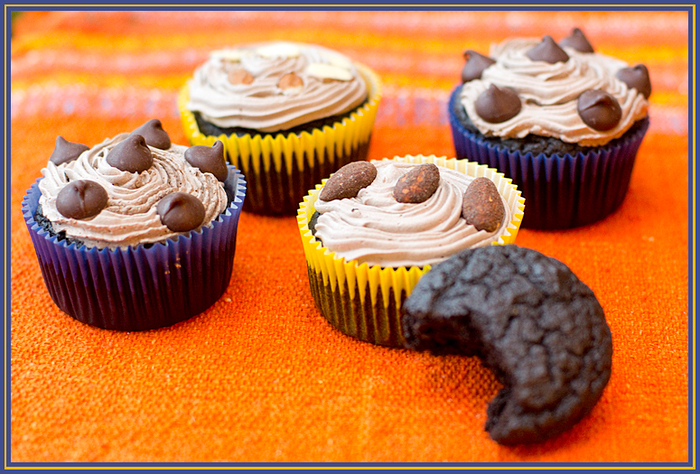

I suggest this fantastic whipped cream frosting recipe from Elena's Pantry for the icing! And if you are like me and prefer chocolate icing with your chocolate cupcakes, then I suggest you add 1 Tbs of cocoa powder to turn Elena's Whipped Cream Icing into a truly sinful tasting chocolate cream icing.

Wednesday, January 22, 2014

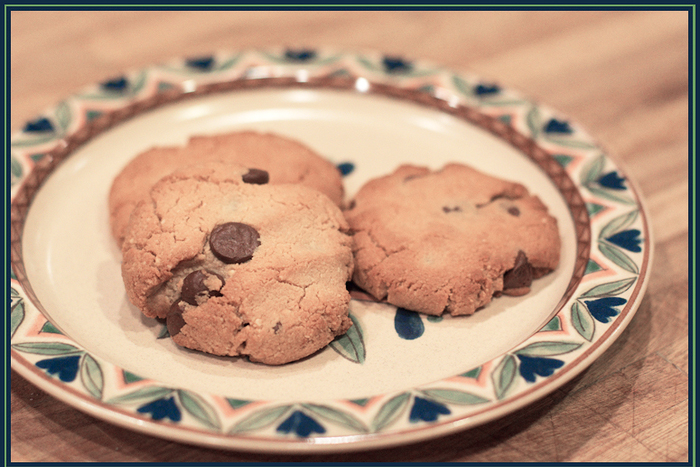
Elena's Primal Chocolate Chip Cookies

Because sometimes you just need a chocolate chip cookie.

I needed one on Monday night. I was feeling ... under the weather ... and I wanted a sweet treat to end the day on a better note.

This is my go-to cookie recipe, it comes from Elena's Pantry and even Wonder Boy swears it's his favorite cookie ever. We served it at Christmas (to family we knew did not have nut allergies) and they all raved about it. This is the kind of recipe that you never feel like you're missing out on the "real deal."

As usual, I highly recommend checking out the original recipe over at Elena's site. I am only posting it here so that if I ever lose that bookmark, I will still be able to find it here.

Elena's Chocolate Chip Cookies

Stuff You Need:
  • 2 cups blanched almond flour
  • ¼ teaspoon celtic sea salt
  • ½ teaspoon baking soda
  • ¼ cup butter, softened (you can substitute vegan shortening or coconut oil)
  • 2 tablespoons honey
  • 1 tablespoon vanilla extract
  • ½ cup chocolate chunks
What To Do:
  1. Put almond flour, salt and baking soda in a food processor & pulse to combine.
  2. Pulse in shortening, honey and vanilla until dough forms.
  3. Remove blade from the processor and stir in chocolate chunks by hand.
  4. Scoop dough one level tablespoon at a time onto a parchment lined baking sheet.
  5. Press balls of dough down gently and bake at 350° F for 6 - 8 minutes or until they are a nice golden brown color.
  6. Now this is the hard part ... let the cookies cool for 15 minutes. They taste better after they have set up a bit and they crumble if you try to pick them up too soon. But they are worth the wait, so hang in there!

Tuesday, January 14, 2014

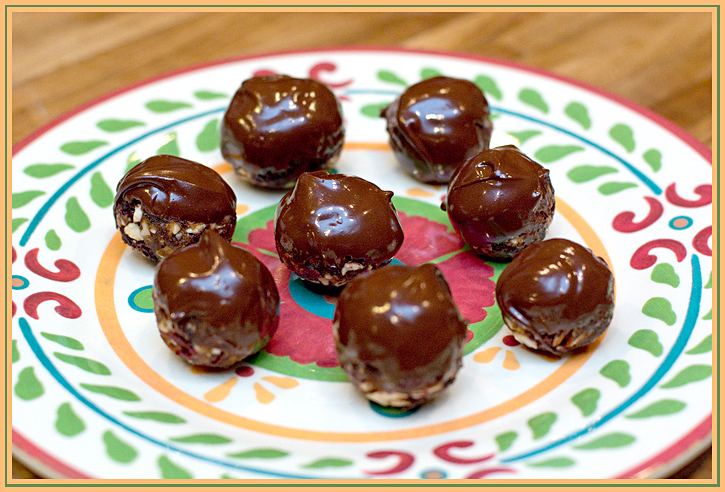
Chocolate Dipped Cherry Pie Bites

O.M.G.! These are just WAY TOO AWESOME to not share with any- and everyone within earshot (blog-shot?).

This is not my recipe, I'm only copying it here so that I don't loose my book mark to it some day. I added only one step (the chocolate part, big surprise, right?), but I strongly suggest that you jump over to Our Paleo Life to check out this and all the other inspiring recipes right from the source!

OK ... so on to the good stuff!

Chocolate Dipped Cherry Pie Bites

Stuff You Need:
  • 10 Medjool Dates, pitted
  • 1 cup almonds
  • 1 cup dried cherries
  • up to 1 Tbs water
  • ½ cup dark chocolate chips
What To Do:
  1. Combine all ingredients (except water & chocolate), in the order listed, in the bowl of a food processor.
  2. Process until mixture resembles coarse gravel.
  3. While the processor is running, add a thin stream of water, about 1 Tbsp, maybe less depending on the moistness of your dates.
  4. Stop the processor and check the mixture inside. If it sticks together when you smush it, then you’ve got the right consistency. If it’s still crumbly, add more water. You don’t want to add too much water because the bites will be too sticky.
  5. When you’ve got the right consistency, roll mixture into tablespoon-size balls, and place on sheet of parchment paper.
  6. Melt your chocolate chips. You can use a double boiler, but since this really isn't a lot of chocolate, I tend to use the microwave on low, 20 seconds at a time until all is melted.
  7. Dip the cherry pie bites one at a time in your chocolate and place back on the parchment paper.
  8. Once the chocolate is set (it only takes a few minutes) you can store these in an airtight container in the refrigerator for about a week (if they last that long)

I'll be honest, when we made these last night, we didn't wait for the chocolate to set. As soon as they came out of the chocolate, we were popping them in our mouths! And we were not disappointed. This is a really nice sweet treat.

In the future, we may try using roasted pecans instead of the almonds. I'll bet this would work VERY WELL with dried blue berries as well. And maybe, just maybe, a dash of sea salt on top of the chocolate to further enhance this decadent treat. Oh the possibilities!

Monday, September 16, 2013

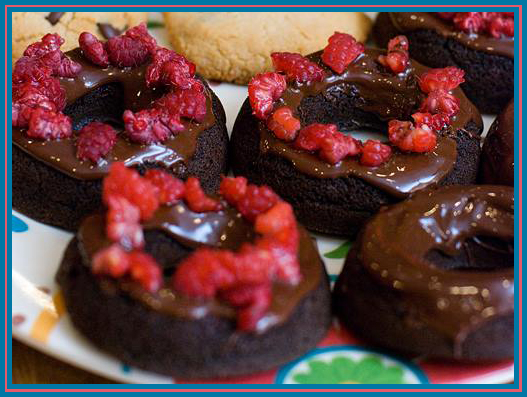
First Share: Paleo Chocolate Donuts

I wanted this first share to be a special one. And this little snack is turning out to be a go-to recipe in that I always pull it out when special occasions (like a birthday or Father's Day) come around and now I am starting to turn to it for pot luck dinners as well.

When we began changing our eating habits, the first thing we thew off the menu was anything containing sugar. And we made this kitchen-centered decision just a week before Mother's Day and only 2 weeks before our anniversary. I'll admit to more than my fair share of bitterness over this call. Holidays and celebrations are normally full of visits from the Chocolate Fairy and I was missing her before we even said "adios."

So when Father's Day came around a month later and I was beginning to come to grips with holidays minus their sugar coating, I went looking for something to satisfy my sweet tooth. After a quick search, I found a couple of recipes for paleo chocolate donuts on the 'net. I didn't have everything on hand to follow just one recipe, so I took these two (this one and this one) and combined them into the following:


Momma G's Paleo Chocolate Donuts

Stuff You Need:
  • donut pan
  • ¾ cup almond flour
  • ¼ cup unsweetened dark cocoa powder
  • ¼ teaspoon baking soda
  • pinch of salt
  • 3 eggs (separated)
  • 3 tablespoons coconut oil, melted
  • 3 tablespoons honey
  • ¼ teaspoon vanilla extract
  • ½ cup chopped strawberries
What To Do:
  1. Preheat oven to 350F degrees.
  2. In a large bowl combine almond flour, cocoa powder, baking soda and salt.
  3. Separate eggs and combine yolks with remaining wet ingredients.
  4. Add wet ingredients to dry and stir until combined.
  5. Beat egg whites with a hand held mixer until light and fluffy.
  6. Fold egg whites into batter until just combined.
  7. Add strawberries, stir gently.
  8. Pour batter into pastry bag (or zip lock bag with the tip snipped off)and pipe into donut pan.
  9. Bake for 12-13 minutes, until a tooth pick inserted comes out clean.
  10. Remove from pan and transfer to cooling rack.
Note: if the strawberries are an issue (due to allergies or if you are just not a fan), feel free to leave them out. I think they help keep the donuts nice and moist, but they are not essential to delivering a satisfying treat. My Wonder Boy is not a fan, so I always make a couple just for him without the blessed berry and he loves them all the same. Other seasonal berries (like raspberries) also work really well, if you prefer.

Momma G's Easy Chocolate Glaze
  • ½ cup dark chocolate chips, melted
  • 1 tablespoon coconut oil
Mix together coconut oil and chocolate then use spoon or knife to scoop out some of the chocolate to glaze donuts. If you have a nice wide bowl, you can always invert donuts and dunk them as well.

I have trouble waiting for them to cool enough for that little trick, so I usually stick to the spoon.

Bacon Bonus!
For a really special treat, I turn to the "bacon bonus." If you decide to up the wow factor on your donuts, you just need to crisp up 1-2 strips of bacon before starting in on you donuts. Allow them to cool completely and crumble. Once your donuts are glazed, generously sprinkle bacon bits onto the top and allow it to set before serving.

I employed the "bacon bonus" when we pulled this recipe back out for Wonder Dad's birthday and it was a HUGE HIT with everyone in the family! Alternately, we have also sprinkled sliced almonds on top as well. And while that too was a crowd pleaser, it was nothing like the response we got with the bacon bits.