Showing posts with label fam fave. Show all posts

Monday, March 31, 2014

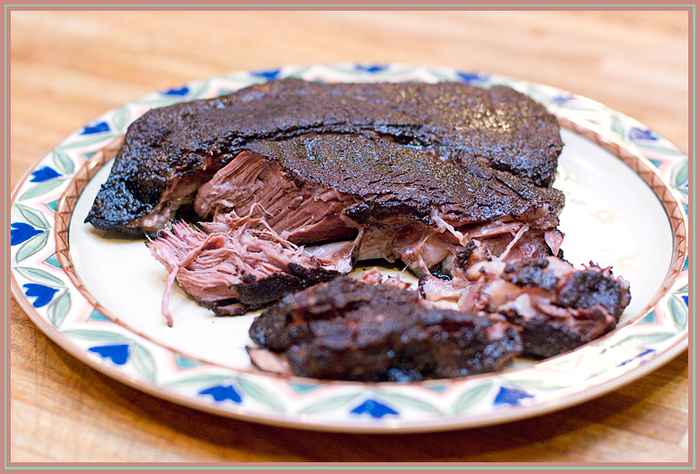
Cocoa-Crusted Slow Cooker Pot Roast

Wonder Boy has a ... how do you say it? ... let's be polite call it a "selective palate," which means I am constantly on the lookout for foods that the whole family can enjoy (so I don't end up making multiple dishes for each meal). And when I find one that works, well, I tend to shout it to the roof tops.

This is one of those rare gems that truly earns the label of family favorite! The fact that it's a crock pot meal to boot is just a bonus!

Cocoa-Crusted Slow Cooker Pot Roast

Stuff You Need:
  • 3 lb chuck roast
  • 2 Tbs cocoa powder
  • 1 Tbs sea salt
  • 1 tsp black pepper
  • 1 tsp garlic powder
  • ½ tsp habanero chili powder
  • ½ dried oregano
  • 1 Tbs grapeseed oil (or olive oil)
  • 1 cup beef broth
  • 1 large onion, quartered
What To Do:
  1. Combine the dry seasonings in a small bowl.
  2. Rub the spice mixture over your roast and refrigerate for 30 minutes (over night is great, if you think about it before hand).
  3. Heat the oil in a heavy bottomed pan (I use a cast iron skillet) over medium hat.
  4. Once the oil is hot (when it starts to shimmer, but before it begins to smoke) add your onions to the pan and let them cook until slightly browned.
  5. Separate the onions and line the bottom of your slow cooker with them.
  6. Add the broth and set aside.
  7. Brown your roast on each side, until you have a nice crust, 2-3 minutes per side.
  8. Transfer the roast to your slow cooker, place on top of the onions, and cook on low for 8 hours.


This comes out of the crock pot ready to fall right apart for you! It's juicy and tender and full of flavor.

We like to serve it with a side of tarrow root fries, snappy apple slaw, or just a fresh green salad.

I hope you will enjoy it as much as we have!

Wednesday, March 12, 2014

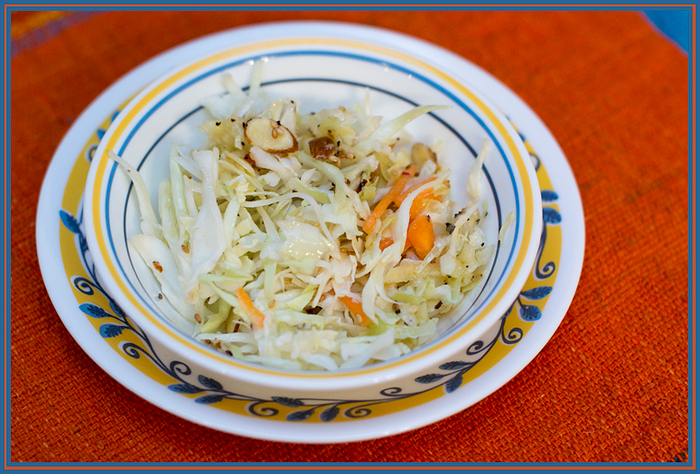
Snappy Apple Slaw

This little side dish is a true go-to recipe for me. When faced with a pot luck dinner, a special family gathering, or just a weeknight meal in need of a little pizazz, this is one of the first dishes I consider.

It's taken a while to get the proportions down just right, as this is an adapted recipe from our pre-Paleo days. And the original had a very healthy (ahem) serving of sugar in it. We decided to try shredded apple in the dressing to sweeten things up, added a touch of honey, changed the type of vinegar, and BINGO - we had the sweet and snappy treat we were craving.

To speed things up, I use a pre-packaged bag of slaw. But shredding the fresh stuff is a great option when you have the time!

Snappy Apple Slaw

Stuff You Need:
  • 1 - 16 oz. bag pre-packaged slaw mix
  • 3 Tbs sesame seeds, toasted
  • ½ cup slivered almonds
  • ¼ cup honey
  • ¼ cup apple cider vinegar
  • ¼ cup grape seed oil (lite olive oil will work as well)
  • ¼ tsp sea salt
  • ¼ tsp ground mustard
  • ½ tsp garlic powder
  • ½ tsp black pepper
  • 1 large apple, peeled and shredded
What To Do:
  1. Combine slaw, toasted sesame seeds, and slivered almonds and set aside.
  2. Warm honey in the microwave for 30 seconds.
  3. Combine honey and the remainder of ingredients in a medium bowl to make the dressing.
  4. Just prior to serving, pour the dressing over the slaw and toss well.


This recipe comes together pretty quickly. In fact, shredding the apple is probably the longest single step. When I make this for a pot luck or some other dinner where we are bringing a dish, I will carry the dressing in a separate bowl, which I warm for 10 - 15 seconds in the microwave (to make the honey pour more smoothly) just before mixing and serving.

We like to change up this recipe from time to time and add mandarin orange slices or switch out the slivered almonds for pecans. I think blueberries would also be fun to try and maybe switch out walnuts for the almonds. The possibilities are limitless!

I hope you will enjoy this snappy side dish as much as we do!

Tuesday, February 25, 2014

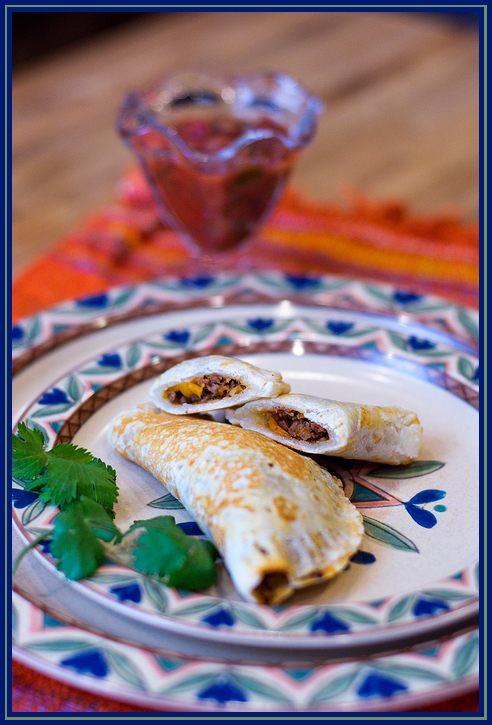
Paleo Pockets (Empanadas)

I have not been feeling my best the last few weeks. And one side effect of my condition is that I am craving high flavor food more than ever. That is due partly to the fact that I haven't been able to taste food that isn't super savory and, of course, when I feel less than my best, I start looking for more of my favorite comfort foods.

But I have to remember, that on these days when I am feeling under the weather, I need good quality foods more than ever.

Enter these little beauties! They are based on the Fabulous Flat Bread recipe I shared a while back and a tried-and-true family recipe for the filling. These little treats are sure to satisfy whether you are craving comfort foods or just want a Tex-Mex taste to top off your day.


Paleo Pockets (a.k.a. Empanadas)

Stuff You Need:
  • ½ cup almond flour
  • ½ cup tapioca flour
  • ½ cup milk + 1 Tbs milk
  • salt (pinch)
  • 1 lb ground beef
  • ½ yellow onion, finely chopped
  • yellow or orange bell pepper, finely chopped
  • 1 jalapeno, seeded, finely chopped
  • ½ cup raisins
  • ¼ cup slivered almonds
  • 1 tsp cumin
  • 1 tsp chilli powder
  • 1 tsp garlic powder
  • ½ tsp black pepper
  • ½ tsp sea salt
  • 2 Tbs butter or ghee, melted
What To Do:
  1. Preheat your oven to 350F.
  2. First we'll prepare our crust/tortillas... put the almond flour, tapioca flour, and salt in a bowl and combine, breaking up any clumps - I use a wire whisk for this, but a fork will work just as well.
  3. Stir in the milk until it reaches the consistency of pancake batter, add more or use less as needed - different brands of almond flour may require a bit more or less depending on how finely it has been milled. You should end up with enough batter for 4 good sized tortillas.
  4. Next, heat a nonstick pan over medium heat and pour ¼ of your batter into the pan. Swirl the pan around to thin out your tortilla to your desired size/thickness.
  5. As soon as you are able, flip over your tortilla and brown the other side. You want your tortilla slightly under-cooked. We'll finish it off in the oven.
  6. After all 4 tortillas are browned on both sides, set them aside until ready to fill.
  7. Now to prepare the filling ... start by browning your ground beef until no pink remains.
  8. Next, drain the beef to remove as much fat as possible and then return the mixture to the skillet.
  9. Next you need to add the onions, bell pepper, and jalapeno to the pan. Saute with the beef until the onions are translucent.
  10. Next, add the raisins and dry spices. Let the mixture cook for a couple of minutes, stirring often, to release the flavor of the spices.
  11. Now we're ready to assemble our empanadas... place a tortilla on a parchment lined baking pan and fold in half.
  12. Lift the tortilla and spoon about 2 - 3 Tbs of the meat mixture inside the fold. Use a fork to crimp the edges shut. Note: since the tortillas are under cooked, this is not difficult and should not require any binder to hold them together. If you run into trouble, you can brush a bit of the melted butter/ghee along the edges to help them stick together while crimping with the fork.
  13. Repeat with the remaining tortillas.
  14. Now you need to brush the tops of your empanadas with the melted butter/ghee.
  15. Bake at 350F for 10-15 minutes, until tortillas finish cooking. They will have a nice golden color once they are done.
  16. Serve with salsa and ENJOY!

You will note that you will have a LOT of left over meat mixture. This makes for FABULOUS left overs. You can always make more empanadas (& I highly recommend that you do so), but this filling is also great along side fried eggs for breakfast, wrapped up in butter lettuce, or topping a killer taco salad! You really can't go wrong with it! This also freezes well so you can always have some when you need a quick week-night meal.

You can fill your empanadas with just about any filling that suits your fancy. The first night we tried these, I filled them with my Crock Pot Carnitas. If you are not strict Paleo, these would be AWESOME stuffed with melted cheese and onions. MMMMMMM I start drool just thinking about it. And there are sweet fillings as well - think apple pie kind of fillings. I haven't tried this yet, but you can bet I'll be back to update the site once I do!

I hope you will enjoy these as much as we have. They have become an instant favorite and they are so flexible and offer so many different options, depending on how you are feeling on any given day. It doesn't get much better than that.

Wednesday, January 22, 2014

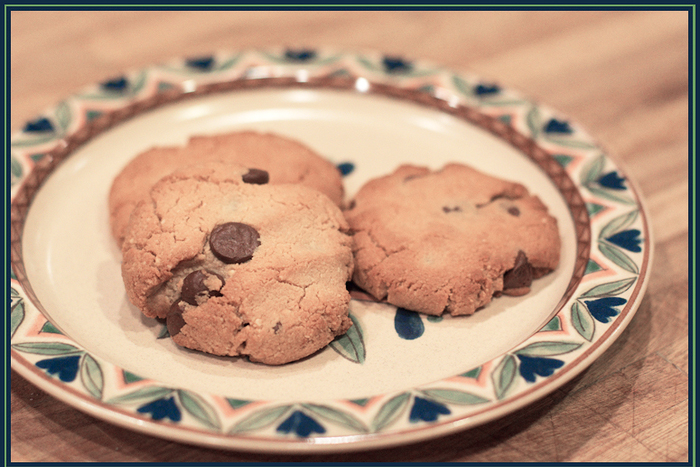
Elena's Primal Chocolate Chip Cookies

Because sometimes you just need a chocolate chip cookie.

I needed one on Monday night. I was feeling ... under the weather ... and I wanted a sweet treat to end the day on a better note.

This is my go-to cookie recipe, it comes from Elena's Pantry and even Wonder Boy swears it's his favorite cookie ever. We served it at Christmas (to family we knew did not have nut allergies) and they all raved about it. This is the kind of recipe that you never feel like you're missing out on the "real deal."

As usual, I highly recommend checking out the original recipe over at Elena's site. I am only posting it here so that if I ever lose that bookmark, I will still be able to find it here.

Elena's Chocolate Chip Cookies

Stuff You Need:
  • 2 cups blanched almond flour
  • ¼ teaspoon celtic sea salt
  • ½ teaspoon baking soda
  • ¼ cup butter, softened (you can substitute vegan shortening or coconut oil)
  • 2 tablespoons honey
  • 1 tablespoon vanilla extract
  • ½ cup chocolate chunks
What To Do:
  1. Put almond flour, salt and baking soda in a food processor & pulse to combine.
  2. Pulse in shortening, honey and vanilla until dough forms.
  3. Remove blade from the processor and stir in chocolate chunks by hand.
  4. Scoop dough one level tablespoon at a time onto a parchment lined baking sheet.
  5. Press balls of dough down gently and bake at 350° F for 6 - 8 minutes or until they are a nice golden brown color.
  6. Now this is the hard part ... let the cookies cool for 15 minutes. They taste better after they have set up a bit and they crumble if you try to pick them up too soon. But they are worth the wait, so hang in there!

Wednesday, October 16, 2013

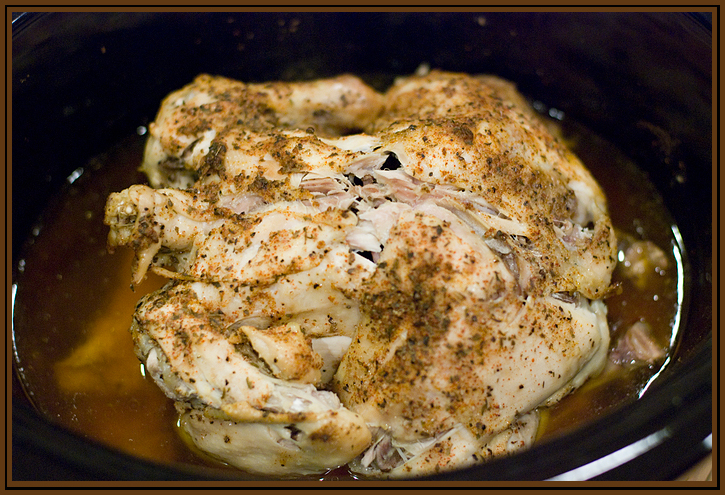
Easy-Peasy Crock Pot Chicken

This is a true go-to meal. We all love it. It can be used in so many ways. It's inexpensive. And it's BEYOND easy to prepare! How can you go wrong with that?!

This recipe is taken directly from the A Year of Slow Cooking. Be sure to take a look because there are a TON of great crock pot recipes and you don't want to miss out!

So without further ado, check out the recipe for ....

Easy-Peasy Crock Pot Chicken

Stuff You Need:
  • 1 whole chicken, skinned (4-5 lbs)
  • 2 tsp kosher salt
  • 1 tsp paprika
  • 1 tsp onion powder
  • ½ tsp dried thyme
  • ½ tsp dried oregano
  • 1 tsp ground garlic
  • ½ tsp cayenne pepper
  • ½ tsp black pepper
  • pinch chili powder
  • 1 yellow onion, quartered
  • 4 whole garlic cloves

What To Do:
  1. Skin the chicken and remove neck, giblets, etc from the interior cavity.
  2. In a medium bowl, mix all of the dry ingredients except the onion and garlic cloves.
  3. Rub the spice mixture all over the bird, both inside and out.
  4. Place the bird breast side down in your crock pot.
  5. Insert the onion quarters and garlic into the interior cavity.
  6. Cover your crock pot, set the timer on low for 8 hours (or if you are in a hurry, on high for 4-5 hours).


And THAT folks, is all there is to this dish! If you plan in advance, you could prepare your bird the night before - skin it and coat with the spice mixture. Then in the morning all you have to do is pop it all in the crock pot. And when you come home from work, dinner will be ready and waiting!

It's not necessary though. I usually don't plan that far in advance and by the time I have the bird thawed, I generally need to get it right in the crock pot so it will be ready by the time dinner rolls around.

Also note, that while the spice mixture has both paprika, cayenne pepper, and chili powder, this is NOT a spicy dish. Wonder Boy really doesn't like spicy food (I don't know where he gets that trait as both of us prefer food that makes us sweat) and this is one of his all-time favorite foods. If you WANT a bit more kick to your chicken, I would double up on these 3 spices and maybe even stick a jalapeno in the cavity along with the onion and garlic.

The chicken comes out moist and flavorful and falling right off the bone! In fact, it's a not the easiest thing to remove from the crock pot because it starts to fall apart from the moment you try to lift it. I usually don't bother. I'll grab what we need for that meal and then proceed to de-bone and shred chicken for storage once it has cooled.

We use this chicken as the base for so many meals. Wonder Boy likes it just wrapped up in a tortilla, fajita style. Wonder Dad prefers it on top of a big salad. As for me - I like it on its own, wrapped up in lettuce (slider style), or on top of tostones with a bit of salsa on top. It really is versatile and that is one of the main reasons this qualifies as one of my top go-to meals!

Enjoy!

Wednesday, September 18, 2013

Crock Pot Carnitas

Living deep in the heart of Texas (clap!clap!clap!clap! - sorry, I couldn't resist), Mexican food is a staple. And that is something I sincerely didn't want to lose with our change in diet.

I gave up the rice and beans and even my beloved enchiladas, but there HAD to be some elements of Tex-Mex cooking that we could keep in our lives.

Enter the not-so-humble carnitas! Always one of my favorites, carnitas are great on their own, wrapped up in a large lettuce leaf, or even as the star of a fancy stir fry. A very versatile dish with lots of flavor! SCORE!

Preparing them in the crock pot means I can throw them in first thing in the morning and know that a super, savory dinner will be waiting for me after work. More often though, this is a weekend meal as it feels like such a treat.

Momma G's Crock Pot Carnitas

Stuff You Need:
  • 4 lb boneless pork shoulder roast
  • 1 tsp salt
  • 1 tsp garlic
  • ½ tsp cumin
  • ½ tsp chipotle chile powder
  • ½ tsp dried oregano
  • ½ tsp ground coriander
  • ½ tsp cinnamon
  • 2 cups chicken broth
  • black pepper and salt to taste
  • 1 Tbs coconut oil (or other oil of your choice)
What To Do:
  1. Mix together salt, garlic powder, cumin, chile powder, oregano, coriander, cinnamon, salt, and pepper in a bowl.
  2. Cut pork roast into 3" - 4" chunks, coat with the spice mixture, and place in the crock pot.
  3. Pour the chicken broth around the sides, being careful not to rinse off any of the spice mixture with the broth.
  4. Cook on low for 6 or 7 hours or until the pork can be easily shredded with a fork.
  5. Before serving, melt coconut oil in a large skillet.
  6. Remove shredded meat from the juice and place in the skillet with the coconut oil.
  7. Stir until evenly browned and you can see a light crisp on your pork.


I have found this to be a true go-to meal (or meal starter). I make it about twice a month, on average, since there are just so many ways to serve it.

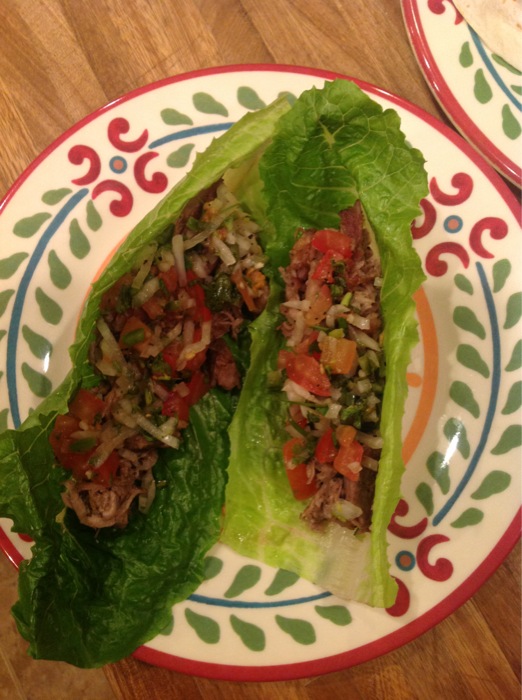
The most common way we eat this family favorite, is as "tacos." For Wonder Dad and I, that usually means lettuce wraps. For Wonder Boy, it's one of his favorite soft taco fillings. Carnitas taste great on salads. They stand up well as the main entree (served with a tomatillo salsa and fried plantains on the side). And Wonder Dad and I both really love carnitas as the starting point for a nice spicy stir fry.

Between being so easy to make and being so versatile, this dish is one of my top go-to meals!

Tuesday, September 17, 2013

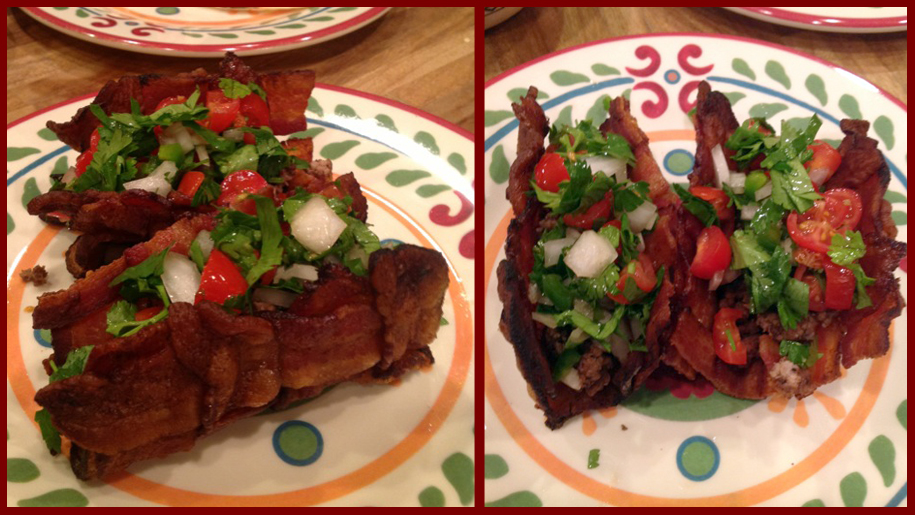
Bacon Shell Tacos

This recipe is almost word-for-word from Nick over at Dude Foods. I decided to give this a try for Father's Day this summer as tacos are one of Wonder Dad's favorite foods. And we had both been missing his favorite crispy treat. Sure, we had been enjoying some nice spicy lettuce wraps, but it just wasn't quite the same experience. So when I saw these instructions on the Dude Foods blog, I knew I had to give it a try.

To say that this dish was a success is such an understatement. Right then and there, Wonder Dad and Wonder Boy alike, put in their "order" to have these as their special meal on their birthdays!

So ... without further ado, I give you the

Bacon Shell Tacos

Stuff You Need:
  • bacon
  • kabob sticks
  • pint-sized mason jars

What To Do:
  1. Preheat oven to 400F degrees.
  2. Create square bacon weave. I used 6 strips across and 6 strips down.
  3. Place in oven and bake for about 15 minutes.
  4. This is the point where I diverge from Nick's instructions. Nick shaped his square weave into a circle, like a traditional taco shell. I didn't feel like going to all that trouble, so I simply sliced mine in half, making 2 rectangles.
  5. Place your mason jars on a cookie sheet lined with aluminum and balance your kabob sticks between them.
  6. Hang the bacon rectangles over the kabob sticks that are balanced across the mason jars and return to the oven for another 10 minutes, until bacon is cooked to desired crispness.
  7. Remove from oven, stuff with your favorite taco meat or fajitas, and top with fresh salsa or pico de gallo.


It has simply AMAZED me how well these hold their shape! And unlike a crispy corn taco shell, when you bite into it, it doesn't crumble all over your plate.

However, with the fat & salt content of the bacon so high, this is not a dish I would label "healthy" and thus this is only a go-to for super special occasions around here. So it is with great anticipation we flip through the calendar, looking for days that are "Bacon Taco Worthy."

On what special days would you break out this incredible treat?

Monday, September 16, 2013

First Share: Paleo Chocolate Donuts

I wanted this first share to be a special one. And this little snack is turning out to be a go-to recipe in that I always pull it out when special occasions (like a birthday or Father's Day) come around and now I am starting to turn to it for pot luck dinners as well.

When we began changing our eating habits, the first thing we thew off the menu was anything containing sugar. And we made this kitchen-centered decision just a week before Mother's Day and only 2 weeks before our anniversary. I'll admit to more than my fair share of bitterness over this call. Holidays and celebrations are normally full of visits from the Chocolate Fairy and I was missing her before we even said "adios."

So when Father's Day came around a month later and I was beginning to come to grips with holidays minus their sugar coating, I went looking for something to satisfy my sweet tooth. After a quick search, I found a couple of recipes for paleo chocolate donuts on the 'net. I didn't have everything on hand to follow just one recipe, so I took these two (this one and this one) and combined them into the following:


Momma G's Paleo Chocolate Donuts

Stuff You Need:
  • donut pan
  • ¾ cup almond flour
  • ¼ cup unsweetened dark cocoa powder
  • ¼ teaspoon baking soda
  • pinch of salt
  • 3 eggs (separated)
  • 3 tablespoons coconut oil, melted
  • 3 tablespoons honey
  • ¼ teaspoon vanilla extract
  • ½ cup chopped strawberries
What To Do:
  1. Preheat oven to 350F degrees.
  2. In a large bowl combine almond flour, cocoa powder, baking soda and salt.
  3. Separate eggs and combine yolks with remaining wet ingredients.
  4. Add wet ingredients to dry and stir until combined.
  5. Beat egg whites with a hand held mixer until light and fluffy.
  6. Fold egg whites into batter until just combined.
  7. Add strawberries, stir gently.
  8. Pour batter into pastry bag (or zip lock bag with the tip snipped off)and pipe into donut pan.
  9. Bake for 12-13 minutes, until a tooth pick inserted comes out clean.
  10. Remove from pan and transfer to cooling rack.
Note: if the strawberries are an issue (due to allergies or if you are just not a fan), feel free to leave them out. I think they help keep the donuts nice and moist, but they are not essential to delivering a satisfying treat. My Wonder Boy is not a fan, so I always make a couple just for him without the blessed berry and he loves them all the same. Other seasonal berries (like raspberries) also work really well, if you prefer.

Momma G's Easy Chocolate Glaze
  • ½ cup dark chocolate chips, melted
  • 1 tablespoon coconut oil
Mix together coconut oil and chocolate then use spoon or knife to scoop out some of the chocolate to glaze donuts. If you have a nice wide bowl, you can always invert donuts and dunk them as well.

I have trouble waiting for them to cool enough for that little trick, so I usually stick to the spoon.

Bacon Bonus!
For a really special treat, I turn to the "bacon bonus." If you decide to up the wow factor on your donuts, you just need to crisp up 1-2 strips of bacon before starting in on you donuts. Allow them to cool completely and crumble. Once your donuts are glazed, generously sprinkle bacon bits onto the top and allow it to set before serving.

I employed the "bacon bonus" when we pulled this recipe back out for Wonder Dad's birthday and it was a HUGE HIT with everyone in the family! Alternately, we have also sprinkled sliced almonds on top as well. And while that too was a crowd pleaser, it was nothing like the response we got with the bacon bits.